Here’s a quick walk-through on setting up a WordPress dev environment on Windows using WampServer.
Install WampServer
Visit wampserver.com and download the latest version of WampServer. This package contains Apache2, PHP 5.3, MySQL 5 and phpMyAdmin.
Download the installer for your version of windows. If you don’t know if your system is 32-bit or 64-bit, right-click on “My Computer” and then click “Properties.”
For Vista and later, look for look for “System Type”

For Windows XP, look for “x64” in the “System” description.

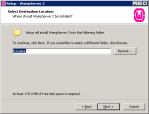
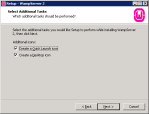
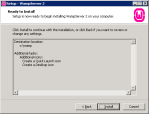
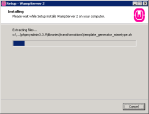
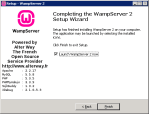
For this walk-through, I will assume you’ll install WampServer to the default folder of c:\wamp. The installation process should look like this:


Configure WampServer
After you’ve installed WampServer, you’ll need to start it and set some configuration options.
- Test that your installation works by visiting http://localhost/. If it doesn’t work, you’ll want to check that your hosts file has localhost mapped to 127.0.0.1 and that you’re not running any other services on port 80. Other web servers (IIS, XAMPP) will try to use port 80. Also WebDAV services (some web drive applications) will try to use port 80. WampServer will tell you if it’s working by the color if its tray icon. Green is working, orange is halfway working, and red is not working at all.

- Check to see that phpMyAdmin is working by visiting http://localhost/phpmyadmin/. If you get an error message of
Cannot connect: invalid settingsthen you’ll need to edit yourc:\wamp\apps\phpmyadmin3.3.9\config.inc.phpfile (your version number may differ) and add this line to your$cfgarray (around line 114 or so):
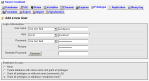
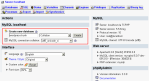
$cfg['Servers'][$i]['AllowNoPassword'] = TRUE; - Once phpMyAdmin is working, create a database for WordPress (I call mine “wordpress-trunk”), then create a user with privileges on the database. In a production environment, make sure you do your research on what these privileges mean and grant only the necessary privileges (e.g. your user will never need
GRANTand should never need,CREATE VIEW,CREATE ROUTINE,TRIGGER, etc.). Here’s what the process looks like in phpMyAdmin:
-
- Click on the WampServer icon, go to the php menu, click on the “php.ini” option. This will open Apache’s php.ini file (note: there’s a separate php.ini file for the CLI version of php located in
c:\wamp\bin\php\php5.x.y\php.ini). Adjust the following settings: error_reporting = E_ALL ^ E_DEPRECATEDerror_log = "c:/wamp/logs/php_error.log"upload_max_filesize = 50Mpost_max_size = 50M- Enable php’s openssl extension by clicking on the WampServer icon, then the php menu, then php extensions menu, then make sure
php_opensslis enabled. If it’s not, click it. WampServer will enable the module in php.ini and restart apache.

- When you’ve finished adjusting your settings, click on the WampServer icon, then click on “Restart All Services” to make the changes take effect


Install a Subversion Client
My personal choice of subversion clients is SmartSVN. My personal taste is to have a separate, self-contained, client and not to use the version control IDE integration and shell integration features that have become popular recently. SmartSVN offers a free version and a paid version. Another very popular option is to use TortoiseSVN. If you’d like to use the command line, you can find windows packages for that, too.
Install WordPress
The most complete resource for this is the codex. For the purposes of this walk-through, you’ll want to check out http://core.svn.wordpress.org/trunk/ to a folder under c:\wamp (e.g. c:\wamp\wordpress-trunk). Then point your browser to http://localhost/wordpress-trunk/ and walk through the installation process. You should see that WordPress created a wp-config.php file for you and this file shows as new in your local subversion project. Unless you have commit access (you don’t) you cannot commit changes back to the repository. Any attempt to do so will result in an error.
Now that you have WordPress installed, visiting http://localhost/wordpress-trunk/ should give you the familiar WordPress home page you’re used to, and http://localhost/wordpress-trunk/wp-admin/ should give you the admin page.
Install Some Plugins
Chances are that your outgoing e-mail will not work. I suggest using the Configure SMTP plugin and using gmail’s SMTP servers.

I also recommend the Debug Bar and Debug-Bar-Extender plugins. To make the best use of these plugins, edit your wp-config.php file and enable WP_DEBUG and SAVEQUERIES. Make sure to see the codex for more wp-config development options.
If you want some sample content, I suggest downloading the Theme Unit Test XML file from the Codex and importing it into your site. You can do this by using navigating to the Tools menu, Import option, then choose WordPress. You may need to install the WordPress importer plugin. After that, just upload the XML file, and make sure to check “Download and import file attachments” option so that the images are saved to your local wp-content/uploads folder.
Note: Jetpack will not work unless your development site is publicly accessible and DNS that resolves correctly. Generally speaking, don’t use Jetpack on your dev site unless you know what you’re doing.
Install an IDE
Everyone has a preference when it comes to integrated development environments (IDE). I like PhpStorm but I use NetBeans because it’s free. Once you set up your IDE, you can start coding. There are plenty of good articles on using xdebug with popular IDEs for advanced debugging. See the NetBeans wiki for information on how to use NetBeans and xdebug.
Profiling WordPress and Plugins
If you are interested in seeing how your WordPress plugins or patches are performing, consider running an xdebug profile. You’ll need to edit php.ini again (click WampServer then php then php.ini), then change xdebug.profiler_enable_trigger to On and restart WampServer. You can now trigger a profile by visiting http://localhost/wordpress-trunk/?XDEBUG_PROFILE=1. This will log all performance information to a file in your c:\wamp\tmp folder. You can view it by visiting http://localhost/webgrind/ or by opening the file in WinCacheGrind.
Note: Using the method above, only URLs containing “?XDEBUG_ENABLED=1” will be profiled. Hits to generated resources (e.g. wp-content/plugins/myplugin/script.js.php) will not be profiled! You will need to use a tool like Xdebug Enabler for Chrome to automatically send the XDEBUG_PROFILE argument for every request.
Contributing
And lastly, make sure read the codex on contributing back to WordPress and consider giving back to the community.
